PEAK Ascents Explained: All Levels, Modifiers and Sash Rewards
Every PEAK difficulty from Tenderfoot to Ascent 8: what each level adds, the sash you earn, how unlocking works in a group, and tips for the hardest climbs.
FAQ
How do you unlock Ascents in PEAK?
Do Ascent modifiers stack?
What is the reward for Ascent 8?
How do you beat Ascent 8?
Does the fog rise faster on higher Ascents?
What should I carry on Ascent 5 and up?
How unlocking works
- At first only Tenderfoot and Peak are available. Peak is the standard game.
- Finishing a run on Peak unlocks Ascent 1; each completed Ascent unlocks the next.
- Choose the level at the Gate Kiosk in the airport.
- Only one player in the lobby needs the level unlocked. Everyone who wins gets the rewards, even if they skipped earlier levels. A new player who wins an Ascent 5 run unlocks Ascents 1 to 6 at once.
- Custom expeditions do not award sashes or badges.
All levels at a glance
Modifiers stack: each level includes everything above it.
| Level | What it adds | Reward |
|---|---|---|
| Tenderfoot | 30% cheaper climbing, 30% slower hunger; no time limit, zombies, Scoutmaster or Big Ghost | None |
| Peak | Standard rules | Tadpole Scout Sash |
| Ascent 1 | Fall damage doubled | Rabbit Scout Sash |
| Ascent 2 | Hunger grows 60% faster | Raccoon Scout Sash |
| Ascent 3 | Every item weighs 2.5 more | Mule Scout Sash |
| Ascent 4 | No flares at the Peak, bring your own | Kangaroo Scout Sash |
| Ascent 5 | Cold nights (about 100 Cold over a night) | Owl Scout Sash |
| Ascent 6 | Climbing costs 40% more stamina | Wolf Scout Sash |
| Ascent 7 | Start with 10 Curse; statue revives add 15 Curse | Goat Scout Sash, Goat Horns |
| Ascent 8 | Free the Scoutmaster’s soul to win | Scoutmaster Sash |
Recommended progression
You can skip levels in a friend’s lobby, but climbing in order teaches one rule at a time:
- Tenderfoot, to learn the island without fog. Zombies and Scoutmaster Myres do not spawn, so the Undead Encounter and Mentorship badges are unavailable there.
- Peak. The fog only starts once you climb high enough or enough time passes; do not rush.
- Ascents 1–3: body rules (falls, hunger, weight). Discipline.
- Ascents 4–6: logistics (the flare, cold nights, costly climbing). Planning.
- Ascents 7–8: team rules (Curse, amulets). One weak link can end the run.
Team composition by band
- Peak to Ascent 3. Spread food, healing and gear across everyone so one death does not lose the bag. Give a First Aid Kit or Fortified Milk to the least experienced climber.
- Ascents 4–6. The player least likely to die carries the flare; another carries the Lantern and heat items for the nights. On Ascent 6 the best climber takes the Chain Launcher.
- Ascents 7–8. More scouts means more slots for amulets. On Ascent 7 the strongest players clear their starting Curse first: newer players die more and regain Curse with every statue revive, so someone clean must reach the top.
Items that gain value
| Item | Why it matters | From |
|---|---|---|
| Remedy Fungus, First Aid Kit | Heal Injury from doubled falls | Ascent 1 |
| Cooked campfire food | Hunger is the silent killer | Ascent 2 |
| Balloon Bunch | Cuts weight even after the +2.5; clown luggage has a 21% chance of one | Ascent 3 |
| Crash Site flare | The only guaranteed flare | Ascent 4 |
| Lantern, Heat Pack | Remove Cold during the night | Ascent 5 |
| Rope, Anti-Rope Spool, Energy Drink | Save stamina on long walls | Ascent 6 |
| Cure-All, cooked Mandrake, Scout Effigy | Lift Curse or revive without it | Ascent 7 |
Tips per level
Ascents 1–3: fall damage, hunger, weight
Double fall damage punishes the jumps that are free on Peak, so climb down short drops instead of jumping. From Ascent 2, cook and share food at every campfire. From Ascent 3 the +2.5 weight is per item, so a full inventory of small items hurts more than one heavy one; drop what you will not use.
Ascent 4: no flares at the top
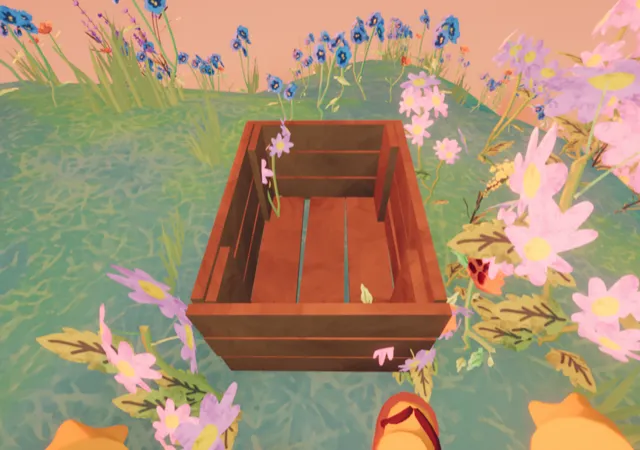
The empty flare crate at the Peak on Ascent 4 and up · PEAK Wiki (CC BY-SA 4.0)

The flare crate at the Peak is empty. The Crash Site always has one flare: pick it up on the Shore and keep it safe all the way up. Escaping through Nadir also works without a flare.
Ascent 5: cold nights
Nights add Cold everywhere except the Caldera and the Gloom, where the effect stops. This changes the Mesa trick of crossing the plateau at night: on Ascent 5+ the night is no longer safe either. Huddling and heat sources such as the Alpine hot spring help.
Ascent 6: costly climbing
Climbing burns 40% more stamina. Pitons, ropes and chain launchers become worth their weight, and the luggage types guide shows which boxes hold climbing gear.
Ascent 7: start cursed
Players start with 10 Curse, and an Ancient Statue revive adds 15 instead of 5. The Scout Effigy and checkpoint flags add no Curse, so save effigies for this level. (Before patch 2.0.a, Ascent 7 did not allow revives at all.)
Ascent 8: free the Scoutmaster
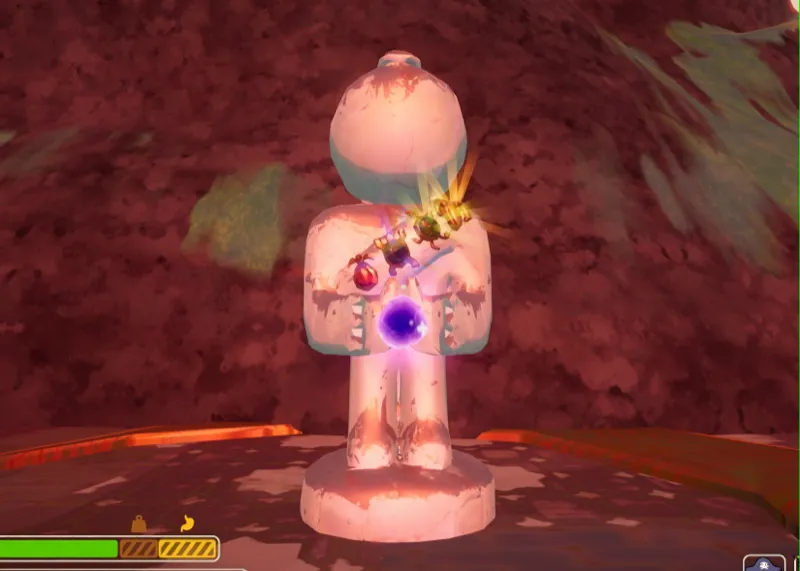
The stone scout with all four amulets · PEAK Wiki (CC BY-SA 4.0)

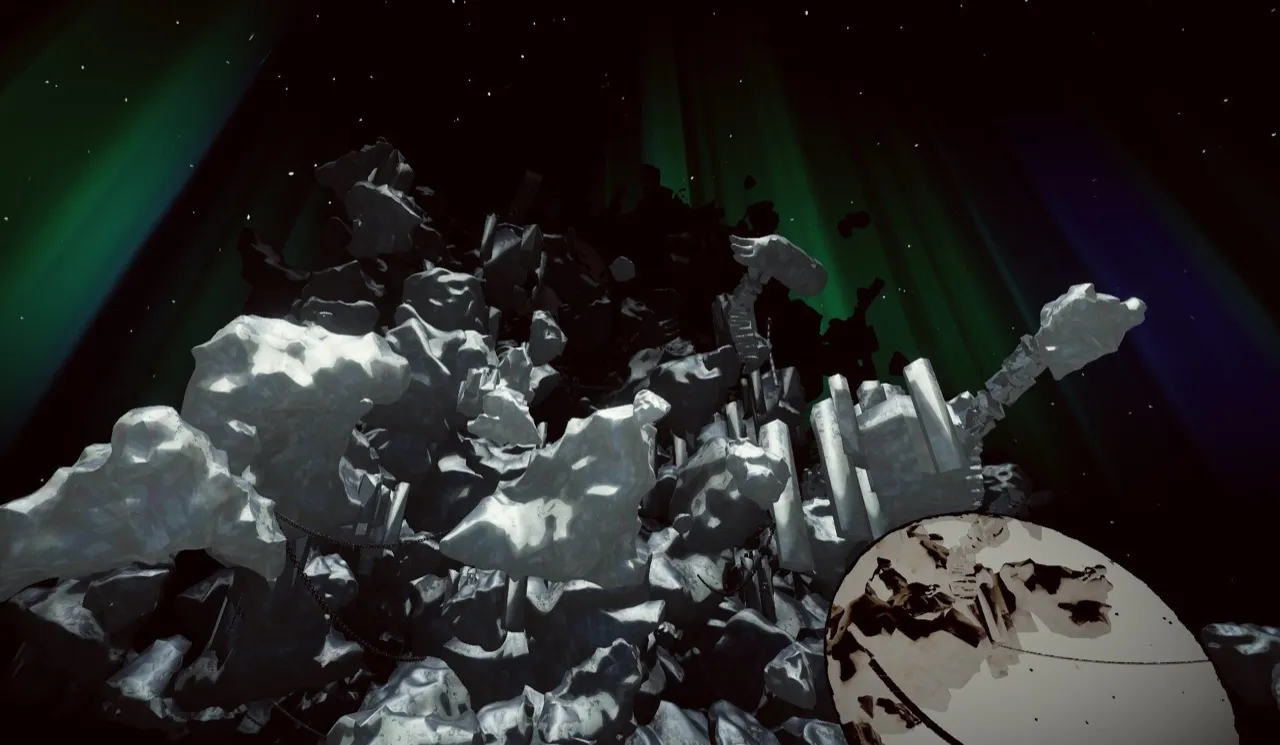
Nadir · PEAK Wiki (CC BY-SA 4.0)

To win, collect all four amulets (Scout’s Generosity, Initiative, Tenacity and Ambition), carry them to the Peak, place them on the stone scout statue behind it, and escape through Nadir. No flare is needed. Players recover 20 Petrify whenever a campfire is lit.
The amulets are spread across the island and their positions are fixed for the day, so scouting them in advance saves a lot of time: today’s amulet locations lists all four by region. Freeing the Scoutmaster also earns the Rule Zero badge.
Planning amulets with the daily map
Each of the first four regions holds one Scout amulet, and which of the four it is changes by island. Check today’s amulets before leaving the beach.
Common mistakes
- Jumping short drops on Ascent 1+ instead of climbing down.
- Forgetting the Crash Site flare, or dropping it near fire: a cooked flare explodes.
- Burning the Lantern early. It lasts 60 seconds of use.
- Relying on statue revives on Ascent 7, at 15 Curse each.
- Treating amulets as dead weight. Their powers help, though using them adds Petrify.
Patch history
| Patch | Change |
|---|---|
| 1.0 (16 Jun 2025) | Ascents introduced |
| 1.61.b (Apr 2026) | Fixed cold nights not applying on Ascent 5+ |
| 2.0.a (11 Aug 2026) | Ascent 8 added; Ascent 7 changed from “no revives” to “start cursed” |
For badges you can earn on the way, see the badge list.
Related Articles
items
PEAK Amulets: Generosity, Initiative, Tenacity and Ambition Explained
What the four PEAK Scout amulets do, how much Petrify each costs, where the amulet statues spawn on the daily map and which amulet to grab first.
guides
PEAK Bing Bong Badge: Where He Spawns and How to Escape With Him
Find Bing Bong on today’s Shore map, keep the plush safe in a Backpack, and escape for the Bing Bong badge — Propeller Hat reward and lobby-wide unlock rules.
guides
PEAK Map Tracker: Daily Map, Rotation and Reset Time
Use this PEAK map tracker for today’s island seed, biome rotation, Tomb status and the 17:00 UTC reset — bookmark once and check before every climb.
Was this helpful?
Thanks for the feedback!